
Step into Tasha Chamberlain’s charming country farmhouse kitchen and dining room, where rustic meets modern, and budget-friendly makeovers reign supreme. In this blog post, we’ll take you on a journey through Tasha’s transformation, showcasing how she turned her outdated space into a cozy and inviting culinary haven without breaking the bank. Get ready to be inspired as we unveil Tasha’s clever tips, tricks, and DIY hacks that will help you achieve your dream kitchen makeover on a budget. So grab a cup of coffee, pull up a chair, and let’s dive into the world of affordable kitchen renovations with Tasha Chamberlain.
-
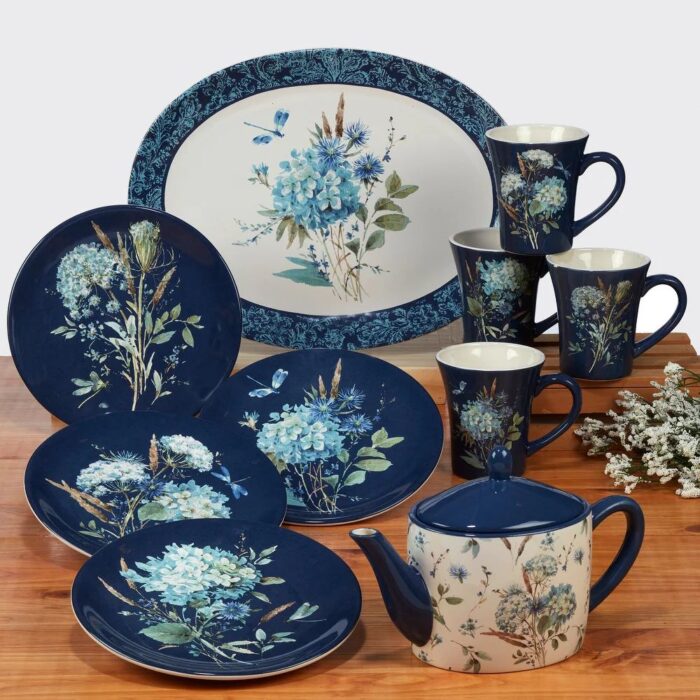
 Bohemian Blue 16-piece Dinnerware Set – Certified International – Service for 4
 -
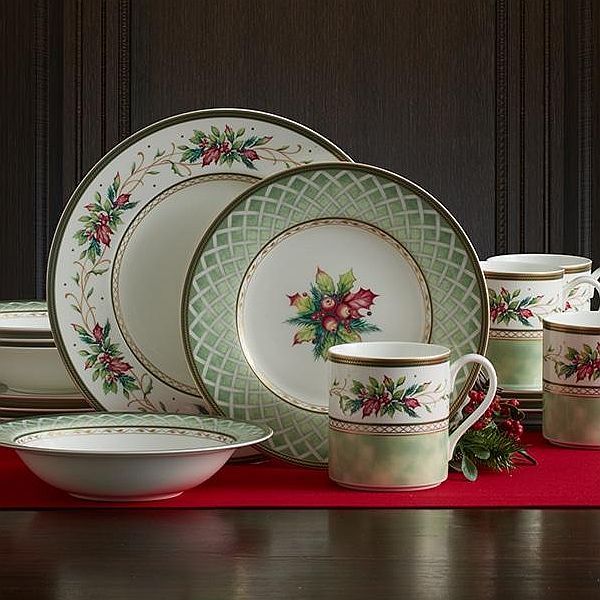
 Winter Holiday 16 Piece Dinnerware Set
 -
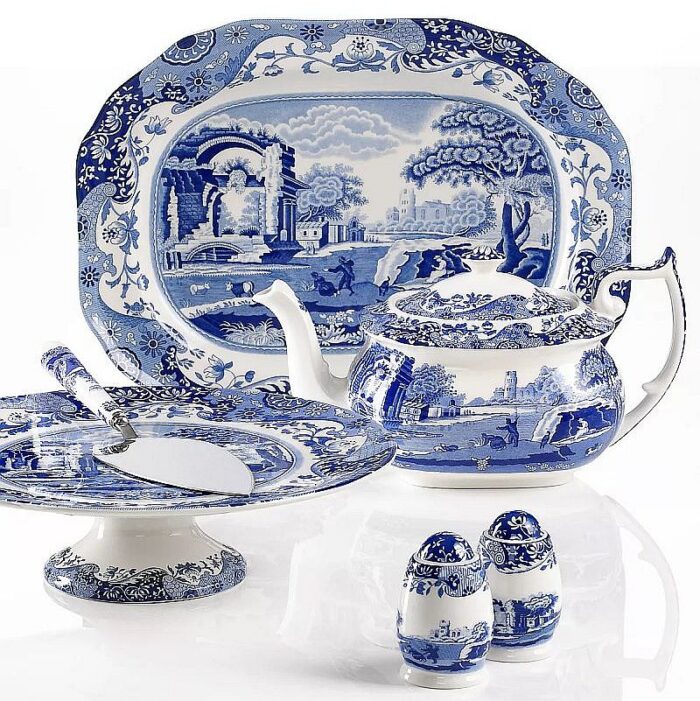
 Blue Spode Italian Serveware Collection
 -
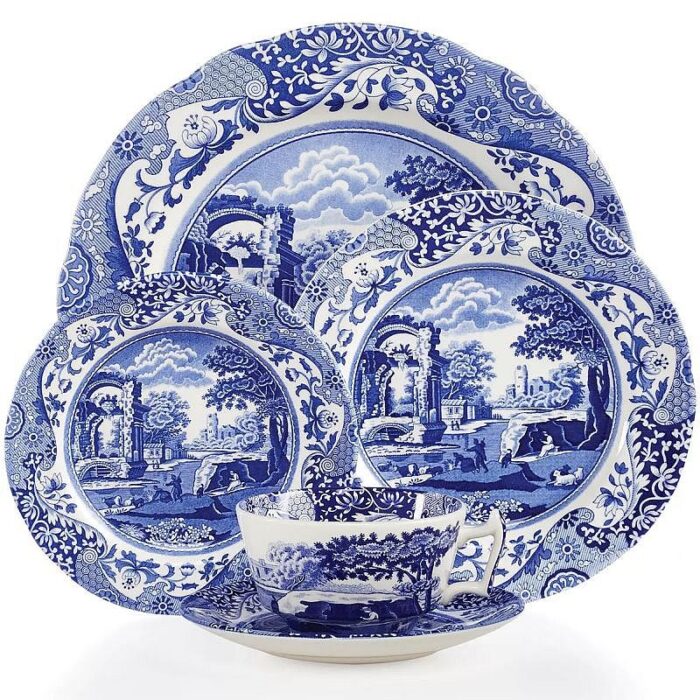
 Blue Spode Italian 5-Piece Place Setting
 -
Certified International Gilded Rooster 16-Piece Traditional Multi-Colored Ceramic Dinnerware Set (Service for 4)


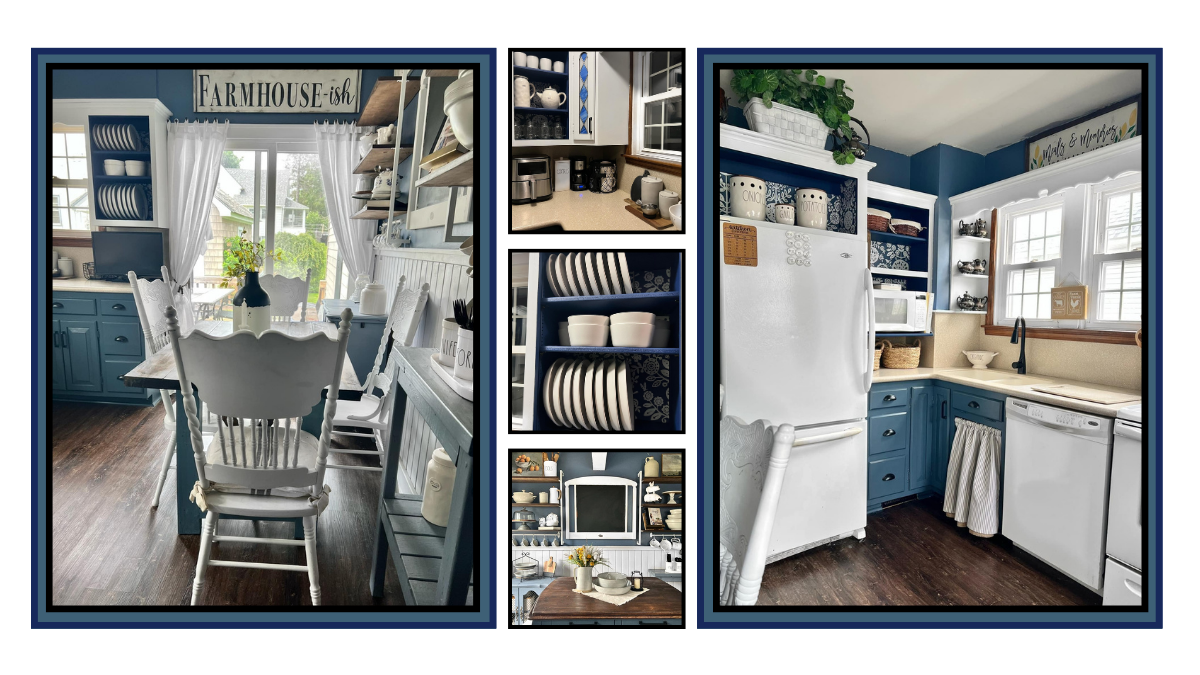
Tasha’s Story – Phase 1
We had purchased a “new to us” home and I wanted to make some changes. The kitchen was giving a true 1970s vibe so we couldn’t wait to start working on it.
Before Kitchen


The linoleum flooring had a very out-dated brown square pattern. Most rooms in the hosue still had the original hardwood that we were able to refinish, but not the kitchen so we laid a luxury vinyl plank flooring. I have to say, the flooring looks amazing. We also removed the wallpaper and painted the kitchen cabinets white. Phase 1 also included painting the walls a modern farmhouse blue color. The tables, benches, and utility cabinets were also painted blue. And finally, the wooden wainscotting in the dining area was painted white. This seemed to be a good place to stop while we thought about what needed to be done next.


Phase 2
I kinda thought I would like to remove my upper kitchen cabinet doors. My husband thought I was crazy, but he’s learned to trust the process. He just didn’t know it was going to be a lengthy process. One change led to a whole new vision in my head and once I started it was hard to stop.
My husband and I brought this version of a dream kitchen to life quickly. Working day and night allowed us to complete the work in one weekend. We started by removing the upper cabinet doors and painting the inside and shelves blue. All of the lower cabinets were painted blue. I reorganized the dishes and other things I had in the uppers so they would work with open shelving. The cabinet hardware was changed and my husband wallpapered the cabinet. I love the pattern, but it was a PAIN in the butt to match up … my hubby cursed me out the ENTIRE time. We’re really happy with the finished result.


Phase 3 – Before Dining Room


The dining room didn’t need a lot. When we lifted the carpet we were lucky enough to find original hardwood flooring. The hardwood was refinished, along with the dining room table and chairs. We had a few furniture pieces that were key to the dining room redo. The cabinet is an 1890s pre Hoosier Kitchen Cabinet. It’s been handed down from my ancestors and is my very favorite piece but the yellow finish wasn’t going to fit in this house so we refinished it also.


After Dining Room


It took me a while to decide where I wanted to place everything and what I wanted to keep or get rid of. I’m so excited to see my vision become a reality and I’m proud that for very little money we have a whole new space!! ~ Tasha Chamberlain
I hope you enjoyed Tasha Chamberlain’s Cozy Farmhouse Kitchen / Dining Makeover on a Budget. I’d like to thank Tasha for sharing her vision with us and congratulate her on a job well done. We’d also love to hear your comments so if you have suggestions, like the post, or just want to say hi, the comment box is on the bottom of this page. Also, I’ve placed a few Pinterest Pins below. Please feel free to share them with your Friends.
Till next time … Joy


